Azure Search is a Cloud service provided by Azure to enable an indexed search over any type of data you can create, It has filters abilities based on Lucene syntax and its has many of the features you would expect from Solr or ElasticSearch.
I will show you how to configure your service, and hot to get data in and perform searches over that data. We will skip the UI part, which you can build with your favorite tool. But I will show you the C# code to talk to the Azure Search Service.
Part 1 - Setup your Azure Search
For this you need an Azure Account, You can apply for a free one if you have a credit card to register. Once you have the Azure Account enter the azure portal:
Once there click the '+' sign to add a new service
- Then on the search box type: 'azure Search' and 'Enter'.
- Then clic the 'Create' button on the lower part of the azure search tab.

Next lets put a name to our service this service can have more than one Index (or type of data) so lets make a general name for it. Select your subscription and click on 'Create'

Now you have to wait until the service its created. Once the service is created you will see it listed on your dashboard. enter the service by clicking on its name.

To load data to our search service we have to create an Index, that has an specific structure of field to hold the data we want indexed and enabled to be searched. (we can have more than one )
So, click the 'Add Index'

We will name it 'countries' because that is the kind of data I plan to add to it. then click on the Fields to add the following fields:
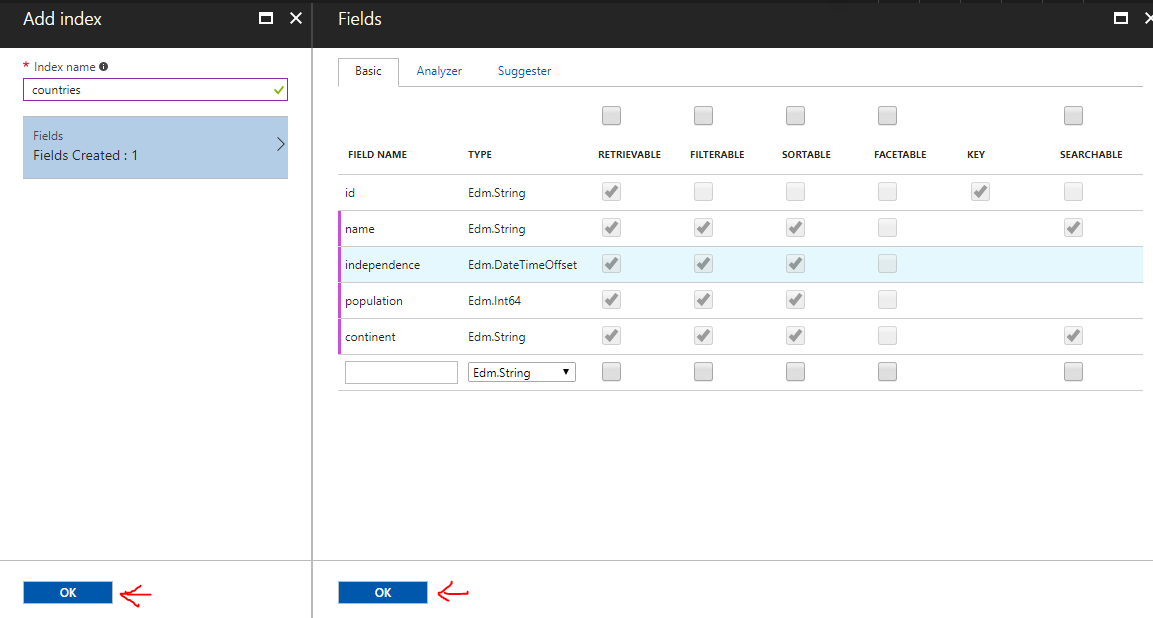
Check the retrievable checkbox, for the columns you want to be enabled to be included on a result.
Check the Filterable for fields that can be queried using filter syntax (like ' age eq 10').
check the searchable fields for the index to enable contextual search on them.
Once you are done click OK on the fields, and OK on the Index creation.
We are almost done, the only thing we need now is the KEY, to connect to the service, you can find it in the keys option under your search service settings:

Take note of those two keys, as we will need them to connect from our app.
That's it, Close the azure portal, and open visual studio.
Part 2 - Build the C# App
Just as a demonstration we will use our search engine from a Console app. So create a new Console Project, and name it 'CountrySearch':

Now lets add the Azure Search library, left click on your solution and select 'Manage nuget packages for solution' then on the Browse tab search for 'Azure.Search', select it and install it.

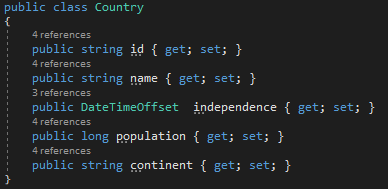
Now we will add a class that has the same structure as our index so we can handle the results of our search, Add the class 'Country' like this:
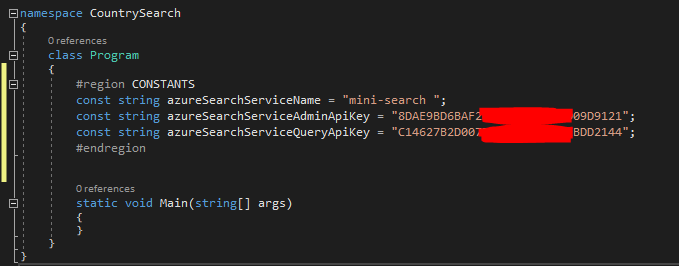
Now on the top of our sample app add the Keys from the Azure Search Service so we can have them available:
Now, Lets Code.
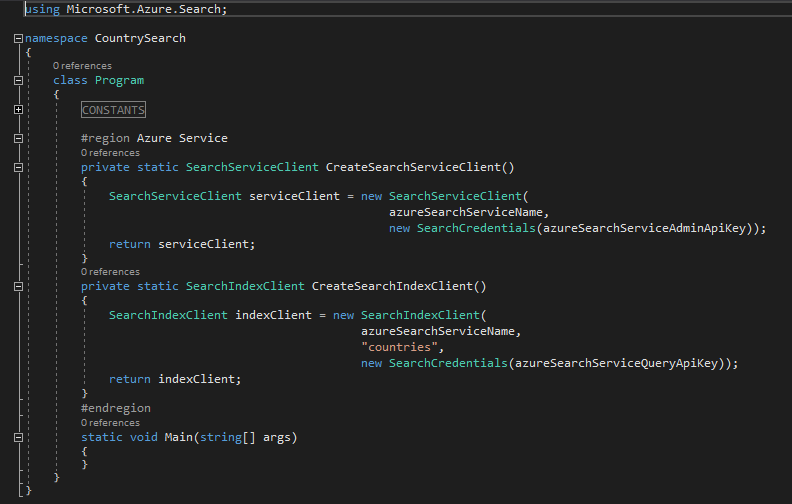
We need to a valid instantiation of the class 'SearchServiceClient' this can be with the admin Key (to enable CRUD over our data) or with the query Key (to enable only Searching).
These two functions create those instantiation for us:
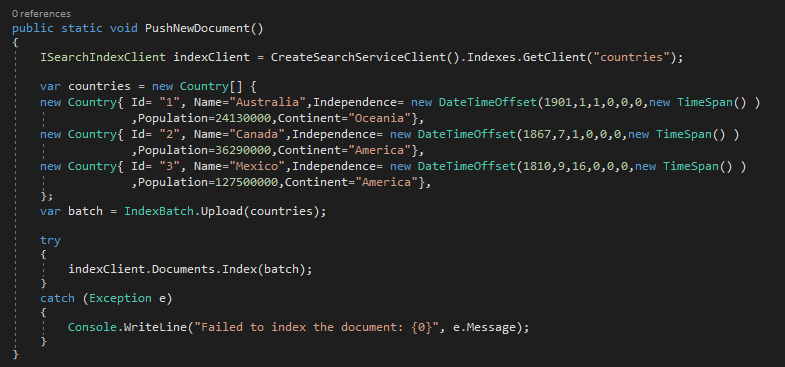
Now lets add a function to add countries to our Azure Search service:
Now lets add a function to query our database in 3 different ways, So you can see the possibilities:

and we will use this function to output the results.


So now lets run our code:

As you can see this is but a little taste of the functionality this service provides, You can index entire documents, and perform indexed search really fast. I hope you can get this tool to some good use.
All the code is available at:
And that, my friend, It's all !
No comments:
Post a Comment